Today is the first day after the winter show. It has been some incredibly exhaustive weeks with very little sleep. Doing a solo project for the winter show was probably a bit too exhaustive. However in the last couple of weeks I did learn so much new stuff. It always remains a bit of a trade-off, going solo saves a lot of hassle and enables you to fully work towards your own vision and makes me learn more, but it’s less fun, more exhausting, and sometimes too challenging.
Initial ideas
An IoT bouncing ball.
Basically this project consisted of three components of which two we’re completely new to me: Product design, microcontrollers and a web-application, in which I already have quite some experience.
Product design…
The product design part was by far the most challeging aspect of this project. I can’t believe how much money I wasted on this. One big lesson I learned from this is that my earlier prototypes should be way simpler. I wanted to explore 3D printing a bit too much in this earlier phase. It takes a lot of time to figure out how this actually works, and the printing itself is also time consuming.
My prototype stage looked like this:
1. Borax + glue (+ cornstarch)
This is the first result you’ll get when you Google how to make a bouncing ball. It’s probably a rather fun thing to do once you have kids. You basically mix the Borax with luke warm water. You throw in a bunch of glue and wait until it becomes more solid.
The result was rather bouncy, however one of the issues is that you have to drop it in water which is a bit challenging when you have microcontroller.
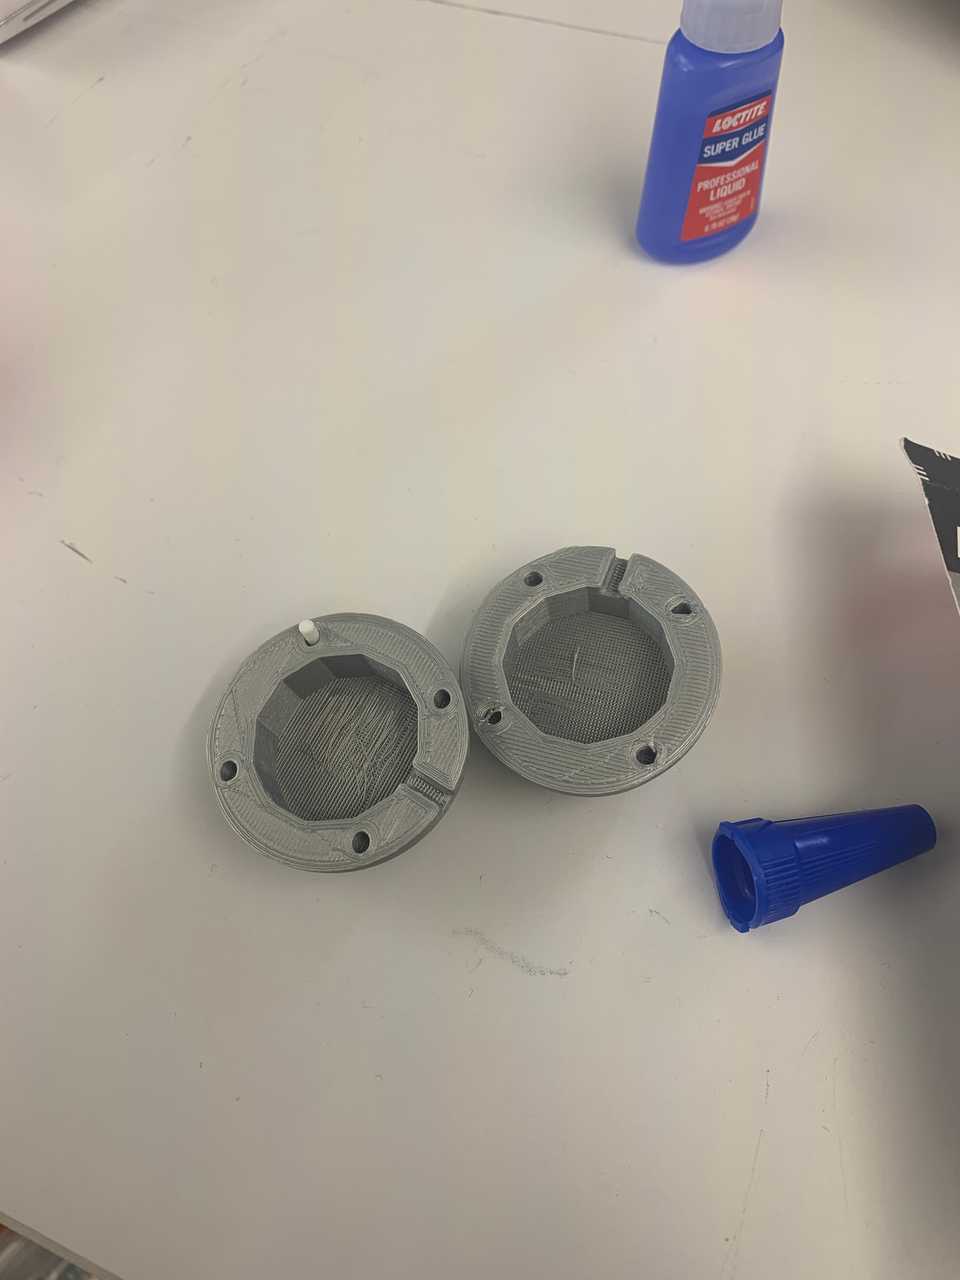
2. 3d print with standard PLA filament (static model without interactivity, partially failed)
This design was already way to sophisticated and was partially based on a tutorial I found on Adafruit. However the material wasn’t bouncy at all and the design was way too sophisticated because at that moment I didn’t even know which sensors I was exactly gonna use.
3. cutting open an existing bouncing ball (failed)
My next trial was to make an existing bouncing ball hollow from the inside. This was rather difficult to do as the material is very flexible. I initially tried a Dremel (burnt the plastic) and then a drilling machine (more succesful but still rather tacky). In the end I did manage to slice the ball and made a hole in it. However since it was difficult to make a perfect hole, the ball wasn’t that bouncy anymore.
4. 3d print with TPU/Ninjaflex filament (failed)
On YouTube I found a video which showed a guy making bouncing balls with a TPU fillament (with the Ninjaflex brand being the most flexible of all). So I immediately ordered some – rather expensive – Ninjaflex. This stuff is notoriously hard to print though, and later on I heard that almost everyone on the floor who tried printing with this had issues with it.
Turns out that most people who print with this stuff use a special nozzle head. Another option is to just keep on tweaking settings until you find the perfect settings that make it kind of work. Which just takes so much time. This stuff literally gave me a headache.
5. buying an exisiting ball and put rubber bands around this (success)
I decided on doing this step after talking with Ben. This should have been the first step as it was the simplest of all and frustratingly enough also the most succesful.
I went to a sporting goods store in Brooklyn. Bought all the balls I could get and which looked kinda bouncy. The most promising was this green hollow ball with holes in it. I was later on told that kids use this to do some kind of baseball.
After that I cut it open. David suggested using bubble foil to cover the microcontroller and sensor, which did it job. Then I wrapped it with rubber bands. The best moments of this prototype was when I had to reset the microcontroller to connect it with Bluetooth and I had to remove all these rubber bands from the ball and put them on again…

I found this other YouTube tutorial that showed how you could make so called ‘proto putty’, an almost play-doh type of material which you can use and form in any shape you want.
It consists basically of Silicone (1, 100% silicone), food coloring and cornstrach to make the stuff less sticky. Silicone however has a very strong acetic acid smell, which made it unusable. It was however rather bouncy… So close.
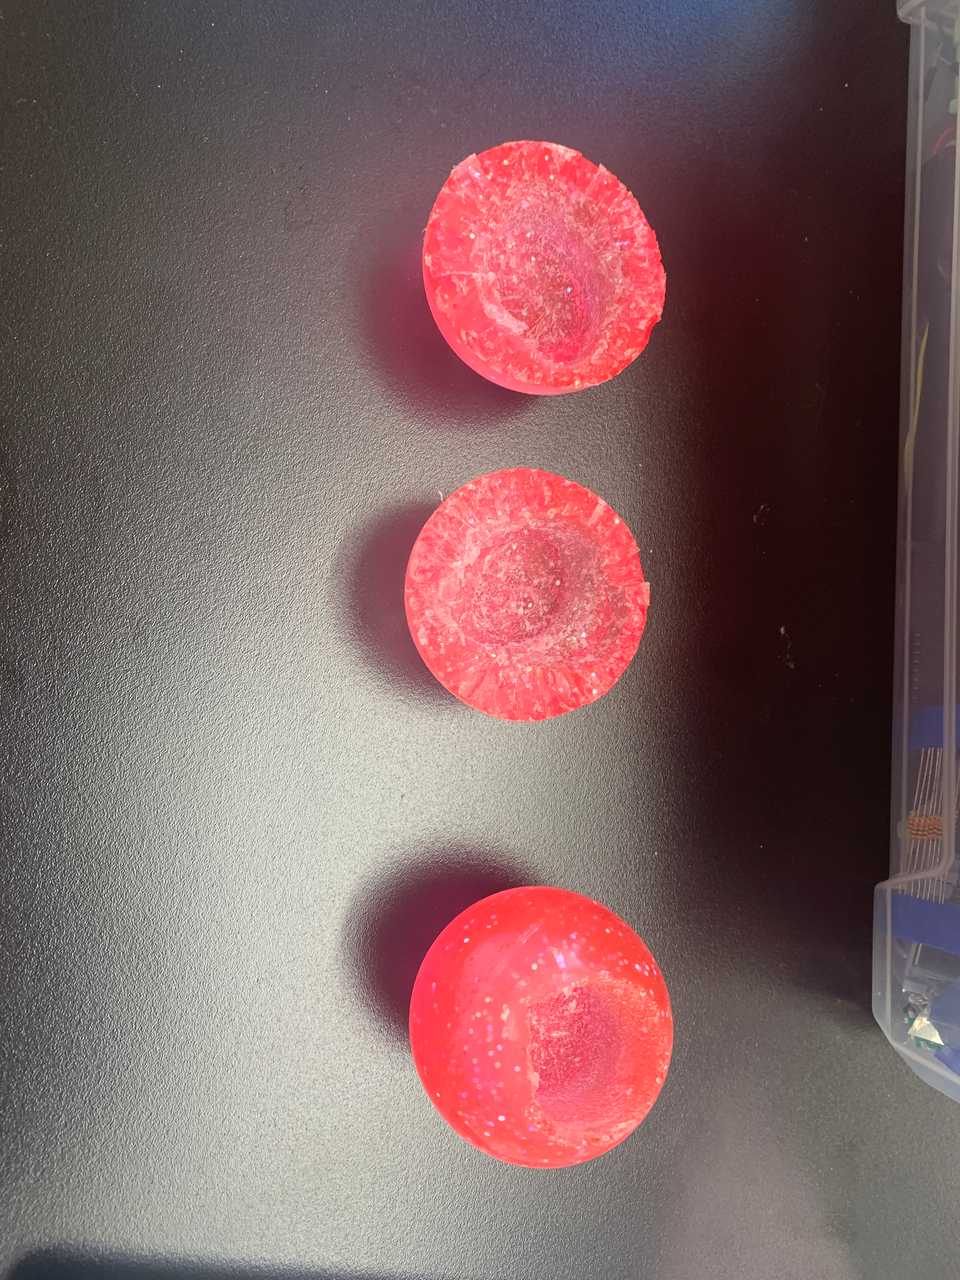
7. creating a ball from sugru (fail, this was a last minute panic solution. Very expensive and complete fail)
After the proto putty I only had one day left for a working bouncing ball. I felt I was so close to a nervous and I got nervous that I wouldn’t find a solution. So I started looking for sugru as I knew that the smell was less worse than that of the proto putty and the material is rather similar. So with Amazon being too late I went to two different Targets and wasted 40 dollar on Sugru.
40 dollar of Sugur however wasn’t enough to have a full ball, and what’s worse is that it cures very slowly and therefor wasn’t very bouncy.
Technical stuff & sensors
The technical components of this project are relatively simple. Quite early on I already settled down on an ESP32, mostly because I had a couple of these microcontrollers laying around. I quickly found out though that the documentation around the ESP32 (and especially the development boards) is a little lacking as there are so many different variants out there.
In a later stage I decided to switch to a Adafruit Feather ESP32 Huzzah development board as this had a JST LiPo/Ion connector (and an automated bootloader which proved to be quite handy in a later phase).
Sensor wise I was initially looking at a LIS3DH accelerometer. Later on I decided to go for a full IMU with 9 degrees of freedom. I picked the NXP FXOS8700 accelerometer and FXAS21002 gyroscope for this (Adafruit).
In the end I only decided on using the accelerometer for this. It was quite a challenge to do a good calculation of impact as there isn’t a fixed axis. The numbers are rather overwhelming. In this prototype I initially decided on doing a diff between two calculations on two different axis. If the difference is bigger than 6 m/s2 it measures a hit. It maxes out one on hit every 150ms to make sure that there aren’t too many triggers.
It’s far from perfect, but it seems to hold up pretty well. I did notice that some people during the winter show had troubles initialising a trigger because they probably hold the ball in such a way that it wasn’t capturing the impact that well.
I was thinking that it might be interesting to see if I can capture the impact through machine learning. Since I’m basically sending all the data every 25ms to the central I have a lot of data to work with. I would have to find a way to detect a start, stop and probably an impact. I wonder though what the latency of such a solution would be.
The karaoke machine
I initially had a couple of applications for the bouncing ball. For instance wouldn’t it be awesome to have a bouncing ball that can trigger a light on and off. Or even have a couple of these bouncing balls in a club where it triggers all kinds of light. Or a team game where you have two teams, the one that bouncs most wins.
For the winter show I eventually chose for a karaoke machine application. It builds further on the ‘bouncing ball’ technique which was invented by cartoonist Max Fleischer in 1930’s for singalong videos. There’s a ball on top of each words, and for each word it bounces further at the moment where it has to be sung. Since I was very much limited on the time that I could spend on building the interface I decided on settling for one song: A-ha’s Take on Me
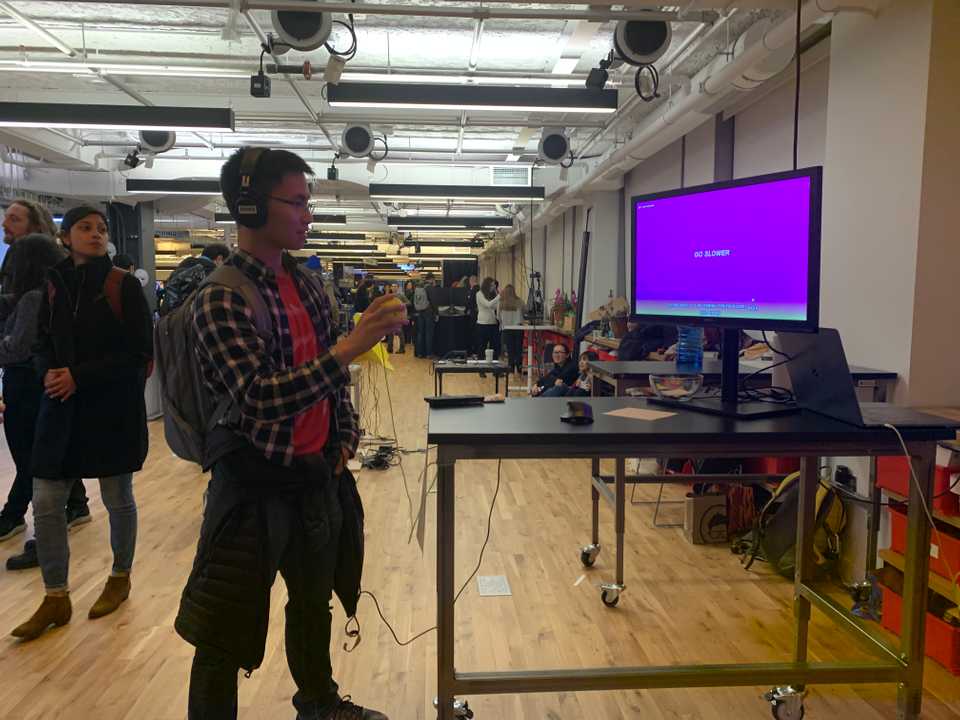
In my application you basically have control over the ball. Every time you throw the ball the word sings. If you throw it on the right moment – that is the moment where it’s originally sung – you’ll get a point.
If a user falls behind – 5 seconds or more – the word will play in slow motion and there is a color distortion filter on top of the karaoke video. I found the karaoke video on a YouTube channel that collects old vintage karaoke video’s. I really love these video’s as they are often incredibly random. There are some really gems in between, one of them for instance is the Simon and Garfunkel Sound of Silence video, where there is a literal intepretation of the song.
The application was built by using Vue, Pixi.js, Howler.js and Anime.js. It uses the Chrome Web Bluetooth Api which is simply awesome. It only suppors Bluetooth Low Energy which was a bit more difficult to setup than Classic Bluetooth, however the connection is very stable and I was very satisfied with it’s performance.
The winter show
In a way the winter show was just one big user testing. Incredibly useful because people have to figure out on their own how to use it. As the audience was quite diverse I did notice that younger people (even those who were born later than Take on me was released had troubles.
It was just fantastic to show this application on the winter show. It was simply amazing to see the joy on some of the faces while they were playing this installation. Normally you never really tend to see the people that use your application. You just put it online and might see some internet feedback, but to really see the emotions on people their faces is just simply amazing.
The feedback I got through it was very helpful. I do notice that there is quite a learning curve for new users. People aren’t really sure whether they have to follow the beat.
Another obvious misstake that I made was that there is a pretty long introduction in the song (around 32 seconds). I had to explain people every time that they had to wait 32 seconds before they could bounce. Which was a little annoying and which some people still didn’t seem to get.
I also thought that everyone would knew Take on me, but apparently there are still some people out there that aren’t aware of this gem in music history. I already wanted to implement this in an earlier phase, but due to lack of time I couldn’t, however it would make sense to guide people more so they know when to throw.
On the other hand however, this random effect is also pretty nice. As you are kind of in control over the music.
More specific feedback
I also received some very specific feedback. Not all of them we’re useful – for instance suggesting that computer vision might be a better approach – but some of them were incredibly useful.
One suggestion I really liked was using different kinds of power throwing. The power with which you throw the ball has a different effect on the karaoke. This could be quite easy to implement as I’m basically already streaming the acceleration data to the browser.
Some other specific stuff that I received was an application to seperate audio and vocals (Rx 7 by Izotope), a Japanese drumming game which has a similar concept (Taiko no Tutsujin). Another feedback idea I really liked was to record all of the versions and to release them somewhere. Someone else suggest that this might also be a nice form of non-boring revalidation therapy
Next steps
To end this already very long post. I feel I’ve been very close to having a fully working bouncing ball. This winter I will work on making a bouncing ball that completely works.
This project also inspired me on some other applications that will use a gyroscope, an accelerometer and web bluetooth. I’m very happy with the web bluetooth and it opens up all kinds of new possibilities. Very curious to explore what’s next!


